# Highext: A Tool to Create Structured Summaries from PDFs
Table of Contents
Summary
Highext started as a personal script to help me write college summaries, but it has since evolved into a full-stack web application. It works by extracting highlighted text from PDFs based on specific colors and formatting it into a structured document.
This lets you quickly generate summaries with Markdown formatting and even a table of contents, just by highlighting your PDF and configuring the colors in the browser.
Where to try it?
Tech Stack
The application is split into a React frontend and a Django backend.
Frontend
The user interface is built with React, TypeScript, and Vite. Styling is handled by Tailwind CSS v4, and I used Shadcn/ui components to build a clean, accessible interface.
Backend
The backend is an API built with Django and Django Rest Framework (DRF). It exposes endpoints to analyze PDF colors, extract text, and convert Markdown to PDF using Pandoc.
Core Logic
The heavy lifting of PDF processing is still handled by my original Python core, powered by the PyMuPDF (fitz) library.
I structured this core logic using principles from Clean Architecture (or Hexagonal Architecture) to keep it decoupled from the web framework. This separates the logic into distinct layers:
- Domain: Contains the core business logic and entities (like a
HighlightorScreenshot). - Application: Orchestrates the workflow, defining interfaces for external tools (like
IPdfParserorIConfigProvider). - Infrastructure: Provides the concrete implementations for those interfaces (e.g.,
FitzPdfParserwhich uses PyMuPDF, orJsonConfigProviderwhich reads theconfig.json). - Presentation: The CLI entry point that wires everything together.
Testing is handled using pytest.
Technical Challenges
While the idea sounds simple, I ran into a few interesting challenges:
-
Mapping Text Correctly: A highlight annotation doesn’t actually “contain” the text. It’s just a set of coordinates for rectangles on the page. The biggest challenge was to reliably find all the
Wordobjects (which also have coordinates) that intersected with these highlight rectangles. This had to account for multi-line highlights and highlights that only covered part of a word. -
Ensuring Correct Order: Annotations aren’t always stored in the PDF in the order they appear on the page. I had to implement a custom sorting key based on an annotation’s vertical (top-to-bottom) and then horizontal (left-to-right) coordinates. This ensures that a highlight at the top of the page is always processed before one at the bottom, making the final summary coherent.
-
Reliable Geometric Intersection Logic: A simple bounding box intersection check was too noisy. It often grabbed parts of adjacent words that barely touched the highlight’s rectangle, leading to dirty or incorrect text. I had to implement a more robust logic (HighlightLine) that only includes a word if the intersection covers a significant percentage of the word’s own width. This ensures only the text truly inside the highlight is extracted.
-
Handling Screenshots: I expanded the tool to also recognize “Square” annotations. The script treats these as screenshot requests. It uses PyMuPDF to render that specific region of the PDF as a high-resolution PNG, crops it, and generates a unique, sequential filename for it (like
1a.png,1b.png) so you can have multiple screenshots on one page.
How it works
Text extraction
Highlights in PDFs are commonly implemented as annotations, which are basically a series of rectangles (with a specific color and transparency) laid over the text. A single highlight can be one rectangle or, if it spans multiple lines, a series of rectangles.
For this to work, we also need the bounding box (the surrounding rectangle) for every word on the page.
As mentioned, the core logic is finding the intersection between the words bounding boxes and the highlights rectangles.
So, for any given page, we have a list of highlight annotations and a list of all words (with their coordinates).
We filter the annotations list for only highlights. Then, we iterate over every word on the page and check if its bounding box intersects with any of those highlight rectangles.
Extracted text format
In the original script, I had to manually edit a JSON configuration file. Now, the Web UI handles this automatically.
- Upload: You drag and drop your PDF.
- Analyze: The backend scans the file and finds every unique highlight color.
- Configure: The frontend presents these colors, and you simply select a format (e.g., “Level 1 Header”, “Bold Text”) from a dropdown menu.
Under the hood, the app still generates the configuration object that maps
colors to Markdown templates. The behaviour logic (joining adjacent highlights
vs. splitting them) is now handled intelligently based on the type of format
you select.
Examples
Summary Generation
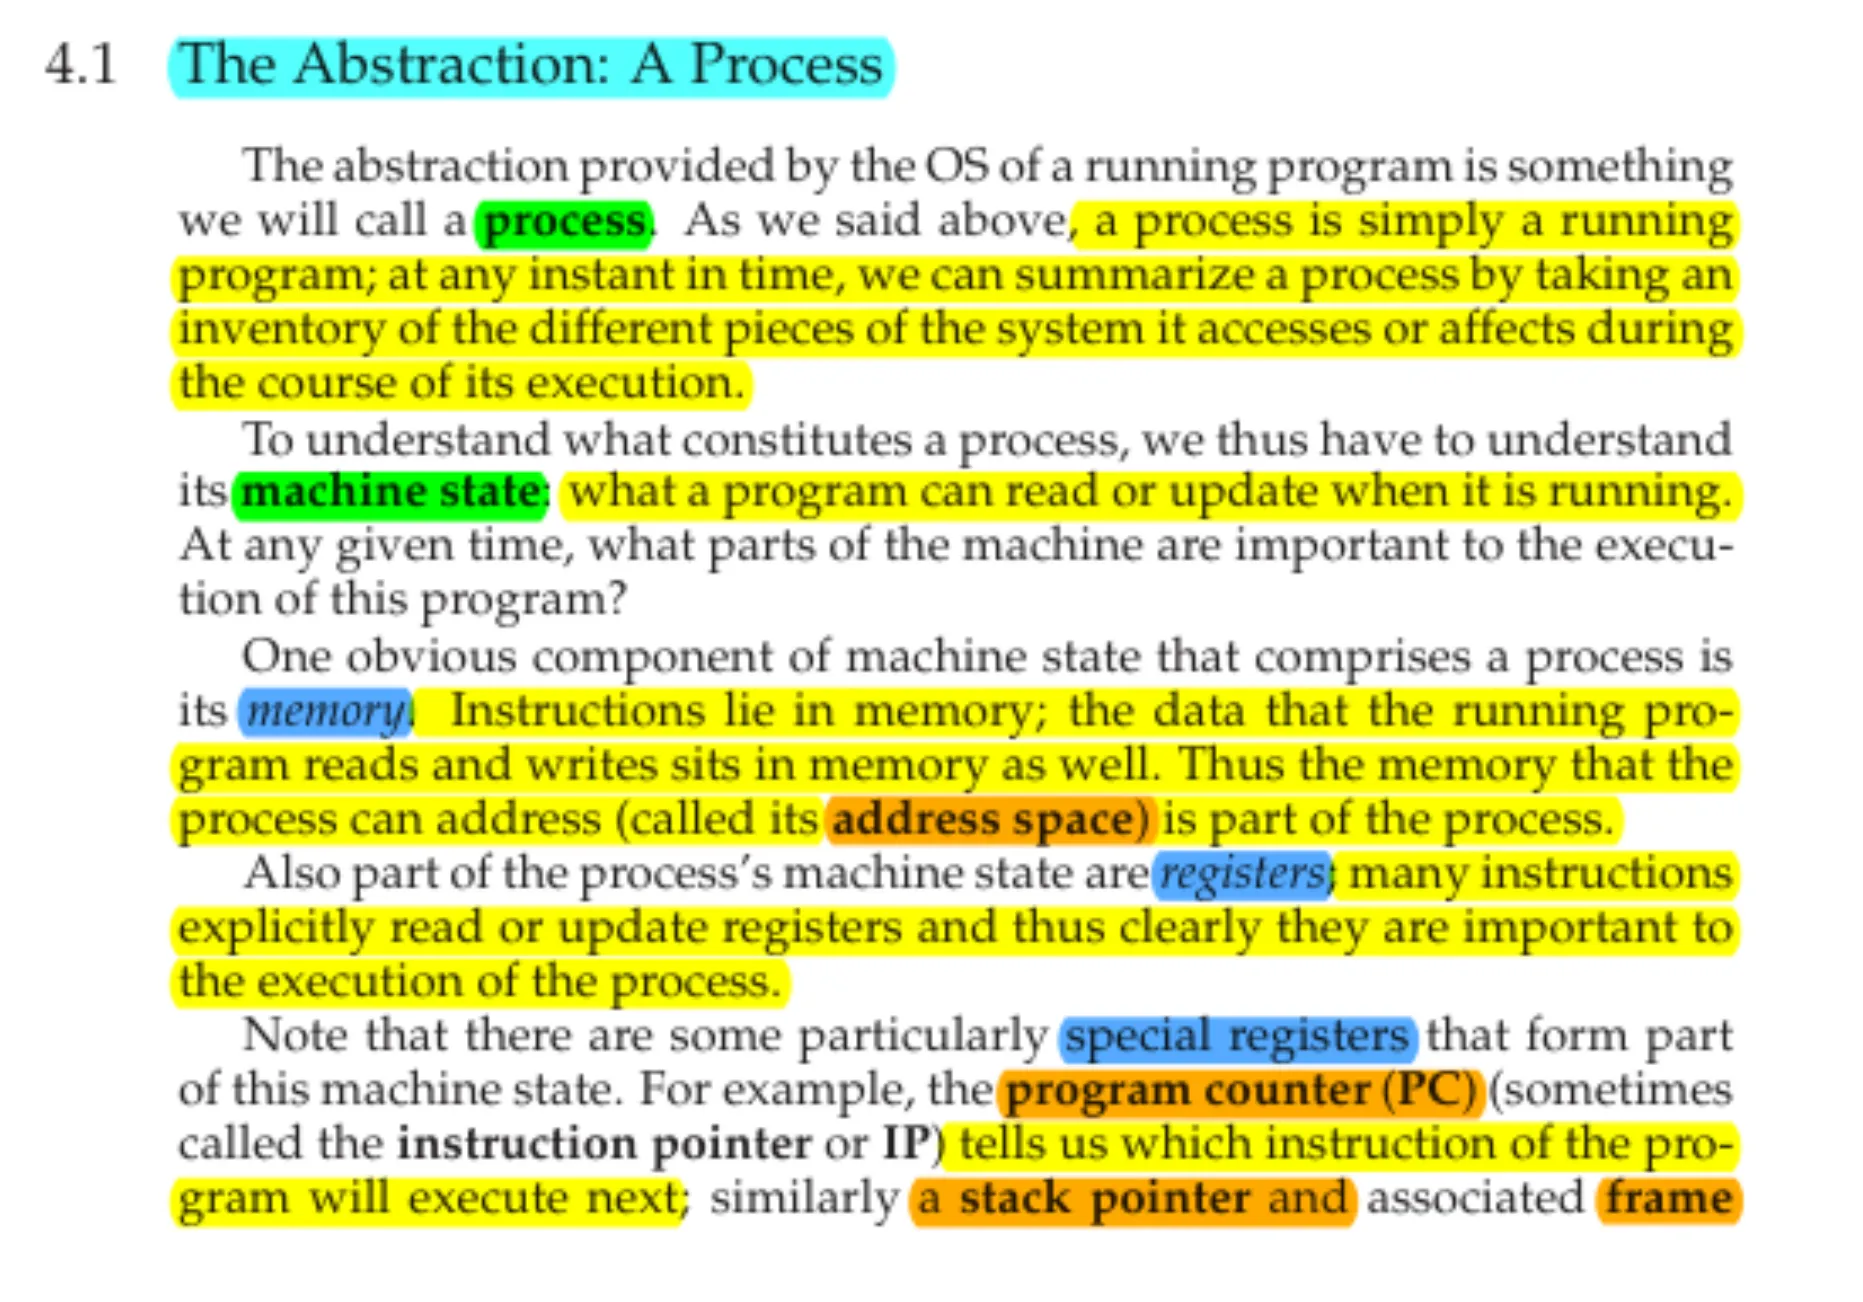
In this example, I’ll demonstrate how I used the script to generate a summary from some college bibliography for an Operating Systems course.
Highlighted text
In this case, we are using the following format:
| Color | Markdown Element |
|---|---|
| Cyan | Level 2 Header |
| Green | Level 3 Header |
| Blue | Level 4 Header |
| Yellow | Normal text |
| Orange | Bold text |
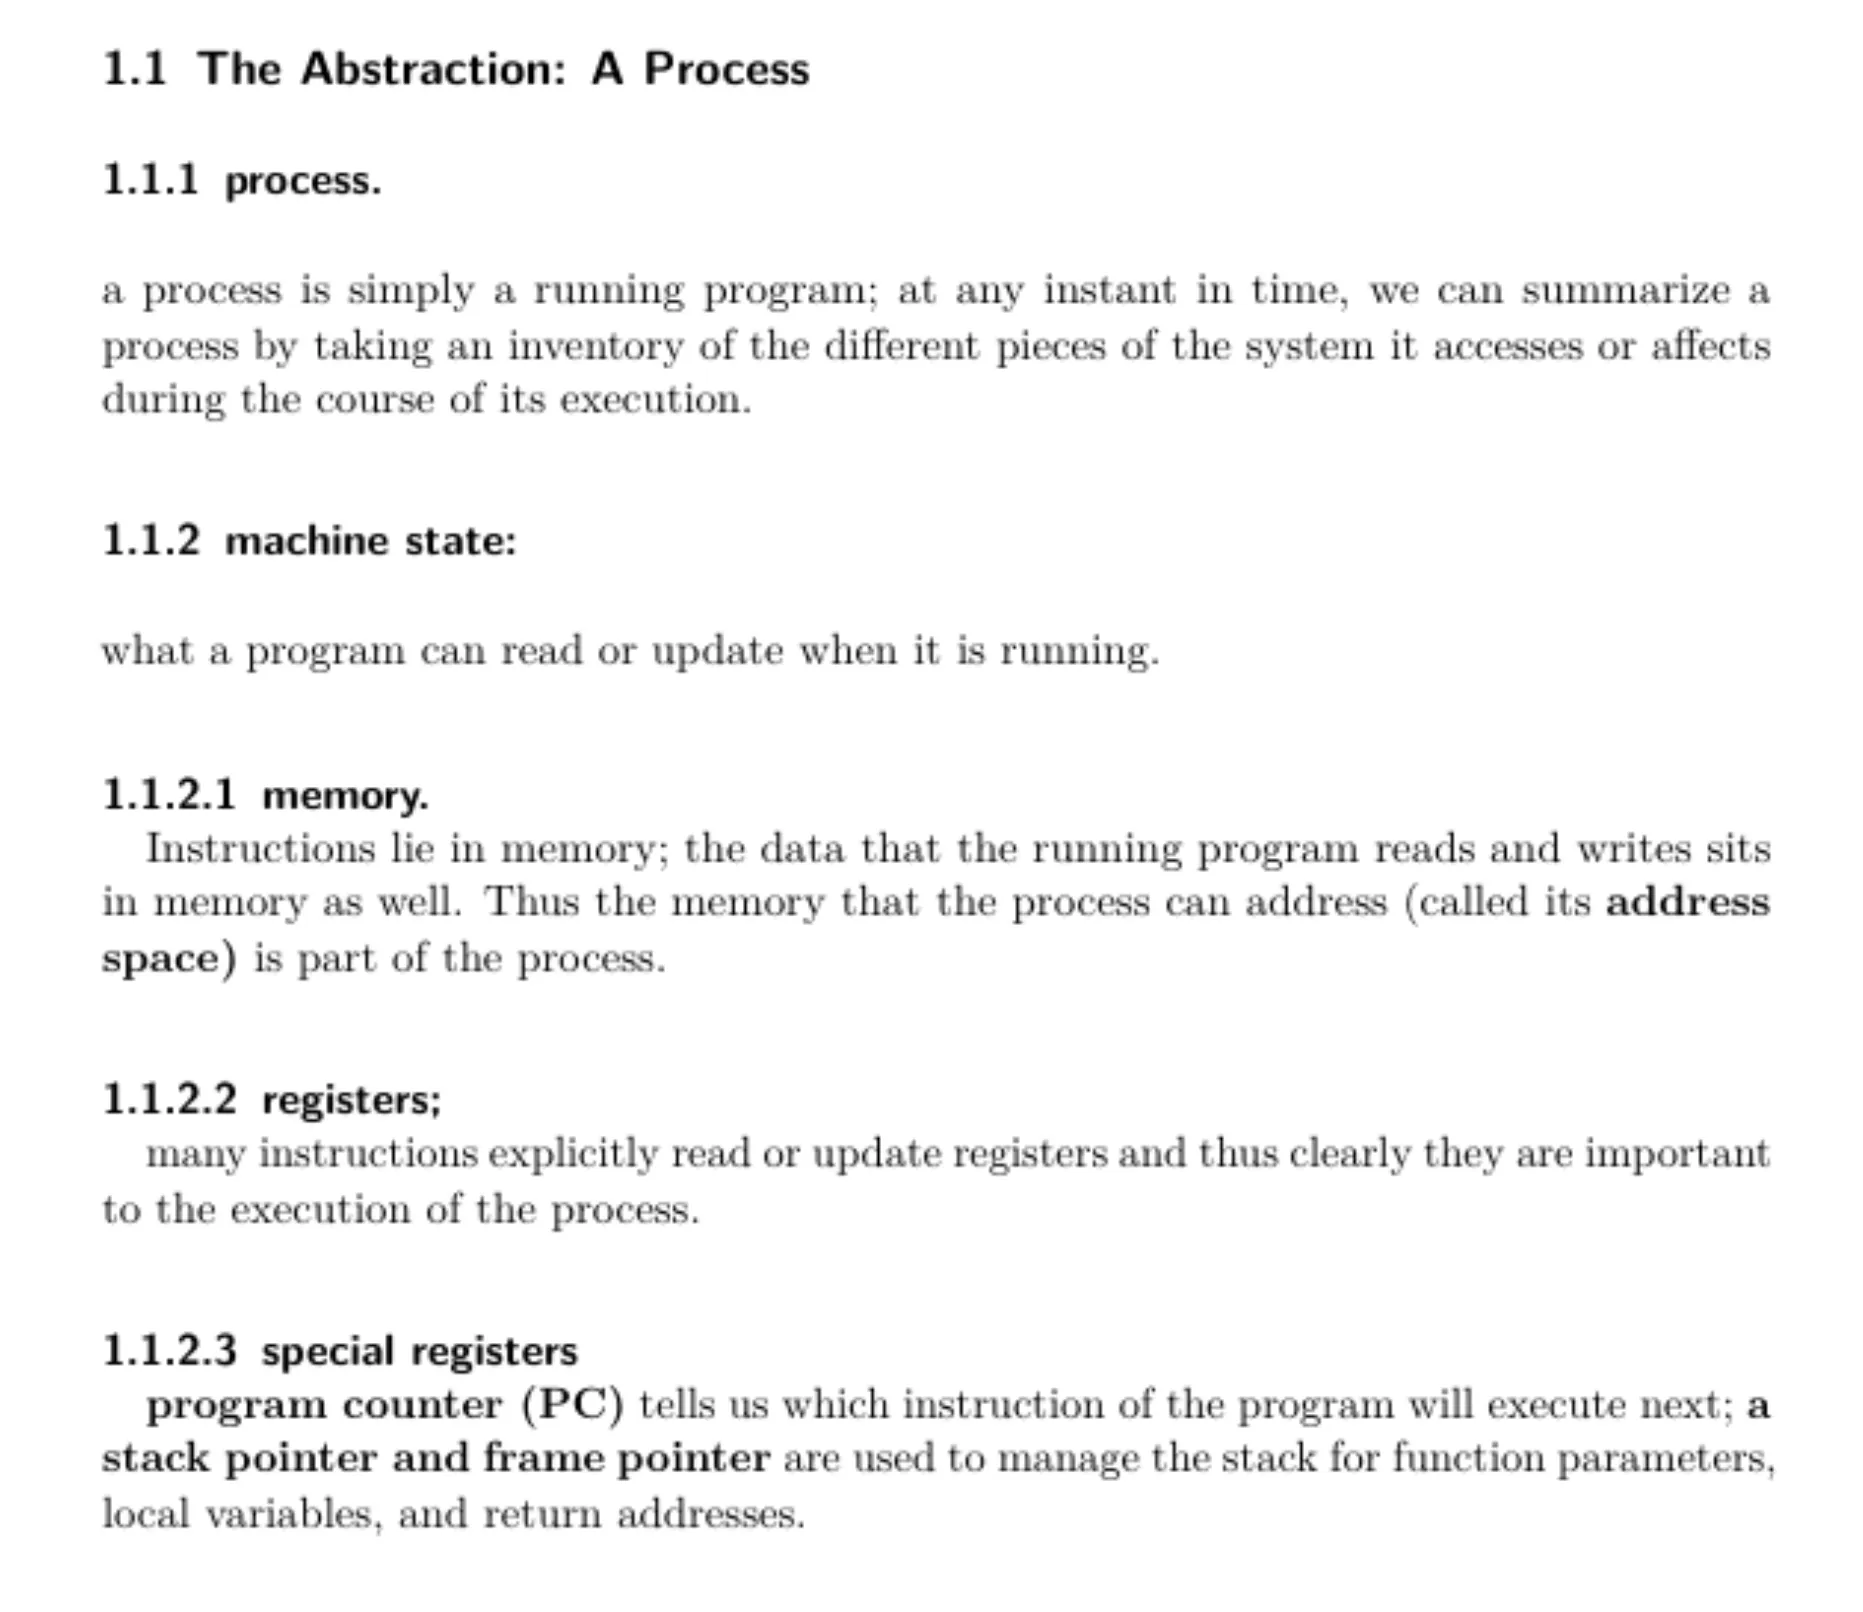
Output
This is the markdown output rendered using pandoc.
 Naturally, this also has a table of contents:

Mind map generation
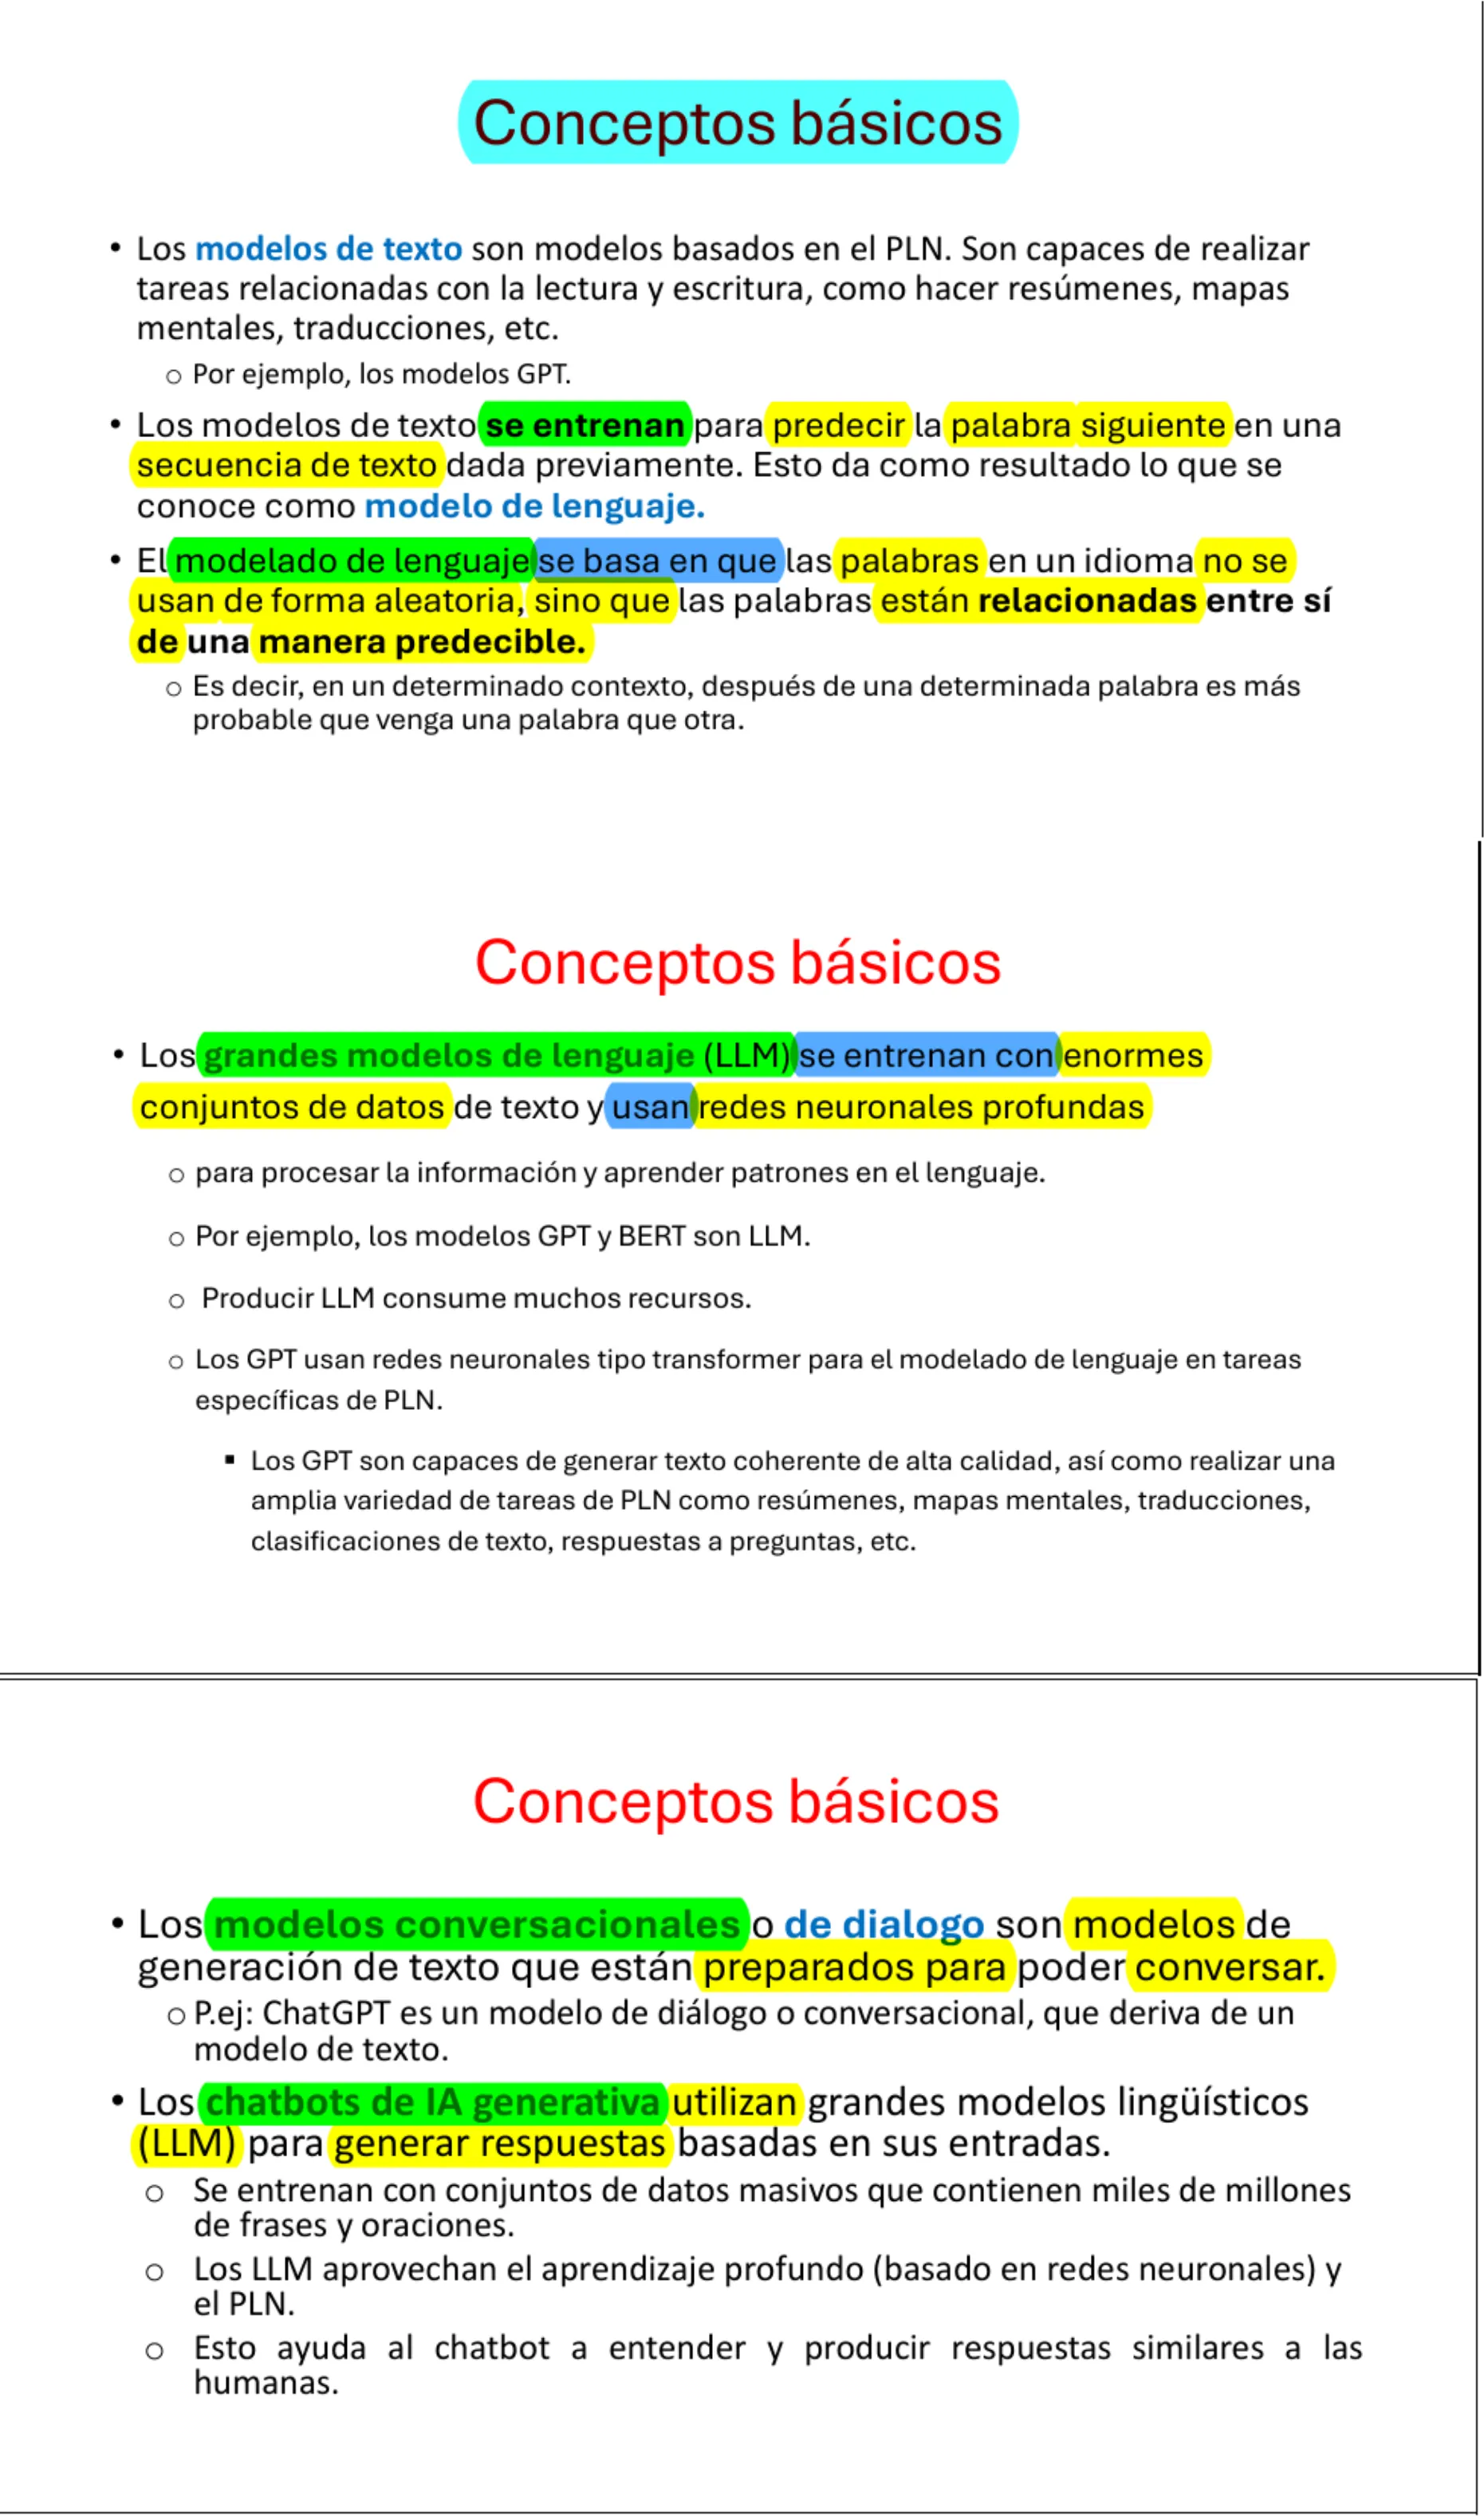
In this example, I’ll show the rendered mind map based on the text extracted from an AI chatbot’s presentation.
Input presentation
Generated mind map

Synergies with other scripts
The script’s Markdown output creates great synergies with custom-made scripts as well as existing programs.
It’s a great plain-text format for headings and lists, and tons of other programs already support it.
Use cases
Convert to Anki cards
If you haven’t heard about it, Anki is an open-source flashcard software that leverages spaced repetition and active recall.
It’s a great way to learn and memorize, and I’ve used it extensively during my college years to memorize math theorems and theoretical knowledge.
Moving on, how does my project synergize with Anki?
Well, I’ve created another script that generates Anki flashcards from Markdown documents. Here’s the link to the repo.
Be warned, in its current state it’s very opinionated and adapted to my past use case, which means that it might not work for you.
There are future plans to improve it and to integrate it better with this script.
Generate mind maps
If you think of each heading and bullet list as a node in a graph, you can easily create mind maps from the script’s output.
In fact, Xmind already does this, letting you import Markdown directly into a fully-fledged mind map.
I’ve used this capability extensively as well, when working with classes that require a great deal of theoretical knowledge in the shape of text, rather than math.
It’s a great way to visualize a whole topic from a bird’s eye view.
It also has the added benefit of skipping the dreadful task of reviewing hundreds of Anki cards in a row, providing more or less the same benefits if used correctly.
History
One of my first programs was a basic script that allowed me to extract highlighted text from Word documents. It was rudimentary, but it saved me a lot of time back in high school.
This idea eventually evolved when I started using more and more PDFs in college.
I really missed the ability to just highlight text, extract it, and create a summary.
At first, I tried looking for libraries that already did what I was looking for, but at that time, I found none that suited my specific needs. Eventually, I came across a Stack Overflow answer about extracting highlighted text from PDFs, which offered a specific method using the MuPDF library.
The answer pointed to a simple concept: you just had to find the words that intersected the highlight’s rectangle annotation.
It was definitely more complicated than with Word documents, but it was nothing out of this world.
Thanks to this, I created my first prototype and started adding more and more features.
Future plans
Create a full-stack application to let users try this script online.(Done!)- Improve the integration between this script and md2anki.
- Build my own mind map generator instead of depending on Xmind.
- Add a PDF editor to avoid depending on third-party apps for text highlighting.
- Integrate image extraction tools from script